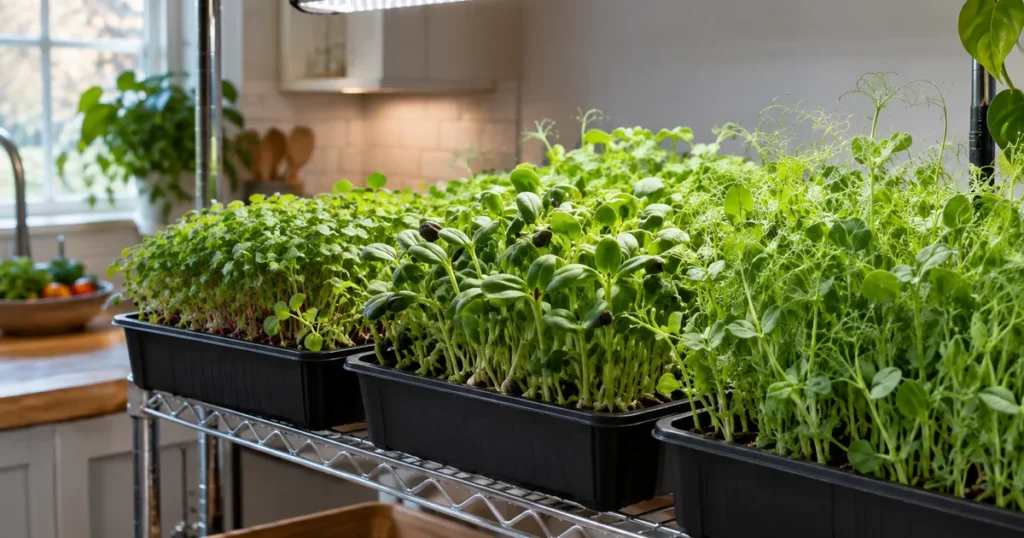
To grow microgreens, sow seeds thickly on a shallow tray of moist potting mix or coconut coir, keep them covered and dark for 2-4 days, then move them under bright light and water from the bottom. Most crops are ready to cut in 7-21 days, when they’re 1.5-3 inches tall and the first true leaves are just appearing. Radish, broccoli, kale, arugula, peas and sunflowers are the easiest place to start.
Quick answer
- You need: a shallow tray with drainage, a second tray without holes for bottom watering, fresh potting mix or coir, microgreen seed and a bright window or grow light.
- Sow densely: about 1/3 to 1 oz of small seed per standard 10 x 20 inch tray; large seeds like peas and sunflowers need much more.
- Blackout: cover the tray for 1-4 days (longer for slow crops), then give 12-18 hours of light a day.
- Harvest in 7-21 days with clean scissors, just above the soil.
- White fuzz on roots is usually root hairs, not mold. Mold looks like cobwebs on the stems and soil.
In this guide
Want every planting date for your region in one place? Get The Year-Round Vegetable Garden (225 pages, $27).
What are microgreens (and how are they different from sprouts)?
Microgreens are young seedlings of vegetables and herbs, grown in a medium such as potting mix or coir and harvested by cutting the stems above the roots, usually 1-3 weeks after germination. You eat the stem and seed leaves, sometimes with the first true leaves.
Sprouts are different. They’re germinated in water or a jar for a few days and eaten whole: seed, root and shoot. That warm, wet, enclosed environment is ideal for bacteria, and contamination usually starts on the seed itself, which is why food-safety agencies advise high-risk groups to avoid raw sprouts. Baby greens are older still, typically cut at 3-4 weeks. Microgreens fall in the middle: grown in light and air, cut above the medium, with lower risk than sprouts, though clean practices still matter.
How to grow microgreens step by step
Microgreens grow indoors, so they work in every USDA zone and every month. Your home’s temperature matters more than your climate: aim for roughly 60-75°F.
- Gather supplies. A standard 10 x 20 inch tray with drainage holes (a “1020” tray) is ideal, or a clean takeout container or pie tin with holes poked in the bottom. Set it inside a second tray without holes for bottom watering.
- Fill with medium. Use 1-2 inches of fresh seed-starting mix, potting mix or coconut coir. Moisten it to the feel of a wrung-out sponge, then level and lightly firm the surface. Hydroponic grow mats also work for fast crops like radish and broccoli.
- Soak big seeds only. Most small seeds go in dry. Soak peas for about 6 hours and sunflower seeds for about 12 hours, then drain.
- Sow thickly. Scatter seed evenly so the surface is well covered with seeds close together but not piled up. See the table below for amounts. Mist the seeds and press them lightly into the surface.
- Blackout period. Cover with an upside-down tray or a lid to keep seeds dark and moist. For large seeds, set 2-5 lbs of weight on the cover tray for the first part of the blackout; this encourages strong roots and even germination. Most crops need 1-4 days covered; slow crops like basil and cilantro need longer.
- Uncover and give light. When seedlings are about an inch tall and pushing up the cover, move them to a bright south-facing window or under a grow light set a few inches above the greens for 12-18 hours a day. Pale yellow seedlings green up within a day.
- Bottom water. Pour water into the solid tray and let the medium soak it up for 10-15 minutes, then drain the excess. Bottom watering keeps stems and leaves dry and reduces disease. Water when the tray feels light.
- Keep air moving. A small fan on low nearby helps prevent mold and damping-off.
- Harvest. Cut with clean, sharp scissors just above the medium when greens are 1.5-3 inches tall, usually when the first true leaves appear.
Garden hack: Cut only what you’ll eat today and leave the rest growing in the tray under light. Uncut microgreens stay fresh for a few extra days, so one tray can feed you for nearly a week.
Gear that helps
- 1020 microgreen trays with and without drainage holes: The standard nested tray setup makes bottom watering easy.
As an Amazon Associate we earn from qualifying purchases. Check current prices and reviews on Amazon.
Best microgreens to grow
Seeding rates below are starting points per standard 10 x 20 inch tray, based on Utah State University Extension’s home-growing guide. Adjust up or down based on how crowded your first tray looks; Penn State Extension passes along a handy rule of thumb from Johnny’s Selected Seeds: about 10-12 small seeds or 6-8 large seeds per square inch.
| Microgreen | Seed per 10×20 tray | Presoak | Days covered | Days to harvest | Flavor |
|---|---|---|---|---|---|
| Arugula | About 1/3 oz (10 g) | No | 1-2 | 6-8 | Peppery |
| Radish | About 1.5 oz (42 g) | No | 1-2 | 8-12 | Spicy, crisp |
| Broccoli | About 1 oz (28 g) | No | 2-4 | 8-12 | Mild cabbage |
| Kale | About 1 oz (28 g) | No | 1-2 | 8-12 | Mild, nutty |
| Pea shoots | About 5 oz (150 g) | 6 hours | 3 | 8-10 | Sweet pea |
| Sunflower | About 1.7 oz (48 g) | 12 hours | 3 | 9-10 | Nutty, crunchy |
| Mesclun or salad mix | About 1 oz (28 g) | No | 3-5 | 12-14 | Mild |
| Basil | About 1 oz (28 g) | No | 4-7 | 12-16 | Intense basil |
| Cilantro | About 1 oz (28 g) | No | 7-14 | 21-28 | Cilantro |
New growers do best with radish, broccoli, kale and pea shoots: they germinate quickly, rarely fail and are ready in under two weeks.
The Year-Round Vegetable Garden (2027 Edition)
Plan the whole season in one place: a 225-page month-by-month guide with calendars for six US growing regions, 50 plant profiles (tomatoes included), 5 copy-ready garden plans and 7 printable pages.
Tomato lover? Add Tomato Mastery, our seed-to-harvest tomato blueprint, for just $10 at checkout.
Get the guide ($27)Gear that helps
- Untreated microgreen seed variety pack: Lets beginners try radish, broccoli, kale and peas with seed sold for microgreens.
As an Amazon Associate we earn from qualifying purchases. Check current prices and reviews on Amazon.
Light for microgreens: window or grow light?
Microgreens are a low-light crop compared with full-size vegetables, but a dim winter window still produces tall, floppy, pale stems. A south-facing window works for quick crops, especially in spring and summer. For consistent results year-round, use a simple LED shop light or grow light a few inches above the trays on a timer. The same setup you’d use for grow lights for seedlings works perfectly, and you can grow microgreens between seed-starting seasons. Pair a tray of greens with an indoor herb garden for fresh flavor all winter.
Mold vs. root hairs: how to tell
A day or two after sowing, many growers panic over white fuzz. Most often it’s harmless root hairs, which radish and other brassicas grow in abundance to absorb moisture.
- Root hairs: fine, fuzzy white strands on the roots only, evenly spread, appearing at the base of each seedling. Mist them and they collapse and seem to vanish; they reappear when they dry.
- Mold: gray-white, cobweb-like growth that spreads across the soil surface and up the stems, often in patches, sometimes with a musty smell. It does not disappear when misted.
If you see true mold, discard the affected tray, compost the medium and clean the tray before reusing it. Collapsed, water-soaked stems at the soil line point to damping-off, the main disease of microgreens. Prevent both with air circulation, bottom watering, correct seed density and fresh medium for each crop.
Watch out: Never grow microgreens from seed that’s treated with fungicide (often dyed pink, blue or green), and don’t reuse old potting mix. Buy untreated seed sold for microgreens or sprouting, ideally from a supplier that tests for pathogens.
Food safety for homegrown microgreens
- Use untreated seed packaged for microgreens or sprouting, and store it cool and dry.
- Wash trays and tools with hot, soapy water between crops, and use fresh medium every time.
- Use clean drinking water for soaking and watering.
- Wash your hands before handling seeds and before harvest.
- Cut above the medium so no soil ends up on the greens; rinse just before eating, not before storing.
- Refrigerate harvested greens in a covered container lined with a paper towel. Penn State Extension notes a shelf life of roughly 10-14 days at about 41°F under good conditions, but home-harvested greens are best within a few days.
Common mistakes to avoid
- Sowing too thinly (sparse, leggy greens) or too thickly (mold and rot).
- Watering from the top every day, which keeps stems wet and invites mold.
- Uncovering too early, before seedlings root, or too late, when they’re tall and yellow.
- Growing in a dim spot without a grow light.
- Reusing old medium or dirty trays.
- Mistaking root hairs for mold and throwing out a healthy tray.
- Waiting too long to harvest; flavor and texture decline once true leaves fully expand.
FAQ
How long do microgreens take to grow?
Most microgreens are ready 7-21 days after sowing. Radish and arugula can be ready in under 10 days, while basil and cilantro take 2-4 weeks.
Do microgreens need sunlight?
They need light, but not necessarily sunlight. A bright south window works, and a grow light for 12-18 hours a day gives the most consistent results.
Can microgreens grow back after cutting?
Most do not regrow well once cut. Pea shoots may produce a smaller second cutting, but for most crops you compost the roots and start a new tray.
What is the white fuzz on my microgreens?
It is usually root hairs, which appear on the roots and vanish when misted. Mold looks like gray cobwebs spreading over the soil and stems and does not disappear when misted.
Are microgreens safer than sprouts?
Microgreens are grown in a medium with light and air and are cut above the roots, so they are generally lower risk than sprouts grown in warm water. Clean seed, clean trays and good hygiene still matter.
Can I use regular garden seed for microgreens?
Only if it is untreated. Seed sold specifically for microgreens is cheaper in bulk and less likely to carry treatments or contaminants.
Keep reading
Sources
- Growing Microgreens – Penn State Extension
- Grow Your Own Microgreens – Utah State University Extension
- Introduction to Microgreen Production in Indoor Vertical Farms and Greenhouses – Virginia Cooperative Extension
- Microgreens: A New Specialty Crop – UF/IFAS Extension
- Sprout Safety – Virginia Cooperative Extension