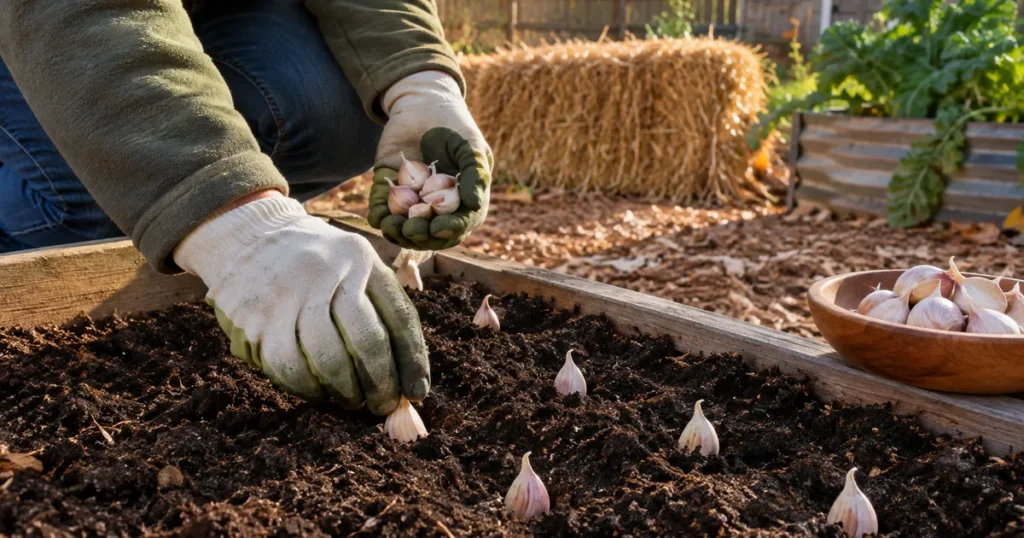
To plant garlic, break a healthy bulb into cloves, set each clove pointed end up 2 to 3 inches deep and about 6 inches apart in loose, well-drained soil, then cover the bed with mulch. In most of the US, you plant in fall, a few weeks before the ground freezes, and harvest the next summer. Garlic needs a cold winter rest to form a proper bulb, which is why fall planting beats spring planting almost everywhere.
Quick answer
- Plant in fall: roughly 1-3 weeks after your first killing frost, or 4-6 weeks before the ground freezes.
- Depth: 2-3 inches to the base of the clove in cold zones (3-6), about 1-2 inches in warm zones (7-10).
- Spacing: 4-6 inches between cloves, 12-18 inches between rows.
- Mulch with 3-6 inches of clean straw or shredded leaves; pull it back from the shoots in early spring.
- Use seed garlic from a regional grower, not grocery-store bulbs.
In this guide
- Why plant garlic in fall?
- When to plant garlic by USDA zone
- Choosing garlic bulbs for planting
- How to prepare the soil for garlic
- How to plant garlic, step by step
- How deep to plant garlic
- Garlic spacing
- Planting cloves vs bulbils
- Mulching garlic over winter
- Fertilizing garlic
- Planting garlic in raised beds and containers
- Spring care for garlic
- A quick look at harvest
- Common mistakes to avoid
- FAQ
Want every planting date for your region in one place? Get The Year-Round Vegetable Garden (225 pages, $27).
Why plant garlic in fall?
Garlic is planted from cloves, not seeds. Each clove you put in the ground grows into a full bulb with a new set of cloves. For that to happen, the clove needs a long chill: Oregon State University puts the requirement at roughly 6 to 8 weeks of average temperatures below 40°F, although some strains need less.
Fall planting gives garlic that chill for free. The cloves grow roots before the soil freezes, sit dormant through winter, then take off as soon as the soil warms. Ohio State notes that fall-planted garlic produces larger bulbs than spring-planted garlic, which tends to give smaller heads.
After the chill, bulbing is triggered by lengthening days and warming soil in late spring. That is why garlic is harvested in summer no matter when you planted it.
When to plant garlic by USDA zone
The simplest rule: plant when the soil has cooled to about 50°F, usually 1 to 3 weeks after your first killing frost. University of Illinois Extension frames it another way: 4 to 6 weeks before the ground freezes. Both rules give the cloves time to root without pushing much leafy growth before winter.
Your USDA zone tells you your average coldest winter temperature, not your frost dates, so use the table below as a starting window and fine-tune it with your local first frost date. For the full date breakdown, including state examples and late planting, see our guide on when to plant garlic in every zone.
| USDA zone | Typical planting window | Depth to clove base | Notes |
|---|---|---|---|
| 3-4 | Mid-September to mid-October | 3 inches | Hardneck types; mulch 4-6 inches deep |
| 5 | Early to late October | 2-3 inches | Hardneck or hardy softneck; heavy mulch |
| 6 | Mid-October to early November | 2-3 inches | Most varieties grow well |
| 7 | Late October to mid-November | 2 inches | Lighter mulch; watch for early sprouting |
| 8 | November to early December | 1-2 inches | Softneck, Creole and some hardneck types |
| 9-10 | November to early January | 1-2 inches | Softneck, Creole or Asiatic types; consider pre-chilling cloves |
Microclimates, elevation and lake or ocean effects shift these windows by weeks, so check your local frost dates or call your county extension office before you plant. Our frost dates by zone guide shows how to look yours up.
Choosing garlic bulbs for planting
Start with clean, firm bulbs grown for planting. Several extension services, including Ohio State and Colorado State, advise against planting grocery-store garlic: much of it is grown in mild climates, may not suit your winters, and may have been treated to slow sprouting.
Seed garlic from a regional grower or a reputable catalog is already adapted to similar conditions and is far less likely to carry diseases such as white rot or bloat nematode, which can live in your soil for years once introduced.
The two big groups are hardneck garlic, which is very cold-hardy and makes a flower stalk called a scape, and softneck garlic, which stores longer and handles mild winters better. Our comparison of hardneck vs softneck garlic lists the best varieties for each zone and where to buy seed garlic.
A rough budget: 1 pound of seed garlic gives about 40 to 50 cloves for large-clove hardnecks and more for softnecks. At 6-inch spacing, that plants about 20 to 25 feet of single row.
Gear that helps
- Seed garlic (hardneck and softneck variety packs): Readers need planting-grade bulbs instead of grocery garlic.
As an Amazon Associate we earn from qualifying purchases. Check current prices and reviews on Amazon.
How to prepare the soil for garlic
Garlic has a small, shallow root system and sits in the bed for 8 to 9 months, so soil prep matters more than with most crops.
- Pick a sunny spot with at least 6 to 8 hours of direct sun.
- Drainage is non-negotiable. Cloves rot in soggy winter soil. If your ground stays wet, use a raised bed or build a mounded row 4 to 6 inches high.
- Aim for pH 6.0 to 7.0. The University of Minnesota recommends that range; a soil test tells you whether you need lime or sulfur.
- Work in 1 to 2 inches of finished compost or well-rotted manure, loosening the top 8 to 10 inches.
- Rotate. Avoid beds where you grew garlic, onions, leeks or shallots in the last 3 to 4 years to limit disease buildup.
- Remove perennial weeds now. Garlic competes poorly with weeds, and fall is the easiest time to clear the bed.
If you are not adding compost, Illinois Extension suggests about 3 pounds of 10-10-10 per 100 feet of row at planting. A soil test is the best guide, since garlic needs only moderate phosphorus.
How to plant garlic, step by step
- Break the bulbs apart 1 to 2 days before planting. Leave the papery skin on each clove and keep the flat base (the basal plate) intact. Cloves dry out if separated weeks ahead.
- Sort by size. Plant the biggest cloves. Large cloves make large bulbs; small inner cloves can go into the kitchen or be planted thickly for green garlic.
- Mark your rows 12 to 18 inches apart, or set up a grid of 6 inches by 6 inches in a raised bed.
- Make a hole or furrow deep enough that the base of the clove sits 2 to 3 inches below the surface in cold zones, or 1 to 2 inches in the South.
- Set each clove pointed end up, flat base down. A clove planted sideways still grows, but upside-down cloves waste energy and make crooked necks.
- Cover with soil and firm it gently with your hand so the cloves are in good contact with the soil.
- Water once if the soil is dry, so roots can start. After that, fall rain is usually enough.
- Mulch once the soil starts to cool (details below) and label the bed with the variety and date.
Garden hack: Cut a scrap of plywood or cardboard into a 12-inch square and drill holes at 6-inch spacing. Lay it on the bed, poke a dibber through each hole to the right depth, and you get a perfect grid in seconds. A wooden dowel with a tape mark at 3 inches works as a depth gauge.
How deep to plant garlic
Garlic planting depth is measured to the base of the clove. University of Minnesota Extension recommends 2 to 3 inches from the base of the clove to the soil surface; South Dakota State goes to about 3 inches. In the colder parts of zone 3 and 4, that extra inch of soil, plus mulch, protects cloves from freezing and from frost heaving.
In the South, extension services such as Clemson and NC State recommend shallower planting, around 1 to 2 inches, because winter soil rarely freezes deep and heavy soils stay wetter lower down. In practice:
- Zones 3-5: 3 inches to the base, about 2 inches of soil over the tip.
- Zones 6-7: 2 to 3 inches to the base.
- Zones 8-10: 1 to 2 inches to the base, the tip just below the surface.
- Heavy clay: stay on the shallow side and improve drainage instead.
Gear that helps
- Bulb planter / dibber with depth markings: Makes it easy to hit the 2-3 inch planting depth quickly.
As an Amazon Associate we earn from qualifying purchases. Check current prices and reviews on Amazon.
Garlic spacing
Most extension recommendations fall between 4 and 8 inches between cloves. Six inches is a good default for big bulbs: it gives each plant room and makes weeding easier. Ohio State suggests 4 to 5 inches in rows 18 to 24 inches apart, while UMass suggests 6 to 8 inches in the row and 12 to 18 inches between rows.
In a raised bed, a 6-by-6-inch grid fits about 4 cloves per square foot, so a 4-by-8-foot bed holds around 120 cloves. Closer spacing means more, smaller bulbs; wider spacing gives fewer, larger ones.
Planting cloves vs bulbils
Hardneck garlic sends up a scape that ends in a cluster of tiny aerial cloves called bulbils. You can plant them, but they are slow: Wisconsin and UMass extension both note that bulbils take two to three seasons to grow into full-size bulbs. The first year usually gives a single round clove, often called a “round.”
Bulbils are useful if you want to multiply a variety cheaply or refresh stock that has picked up soil-borne disease. Plant them about 1 inch deep and 1 to 2 inches apart in a nursery row, then replant the rounds the following fall. For a harvest next summer, plant cloves.
Mulching garlic over winter
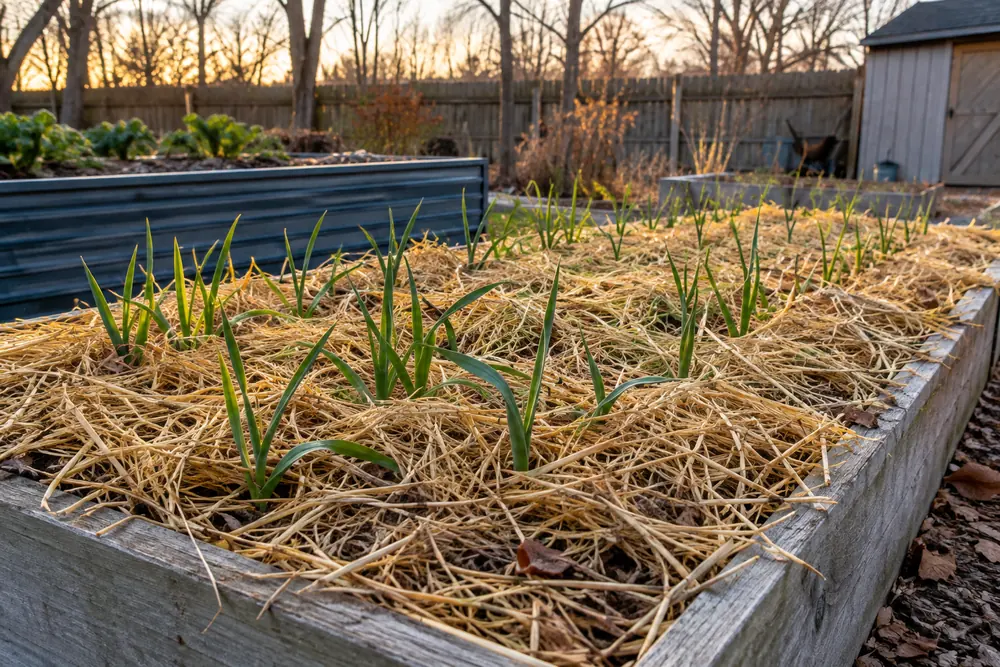
Mulch is what lets garlic survive zone 3 winters and keeps it from sprouting too early in zone 7. It buffers soil temperature, cuts frost heaving (which pushes cloves out of the ground), holds moisture and smothers spring weeds.
What mulch to use
- Clean straw (wheat or oat) is the classic choice. Avoid hay, which carries weed seeds, as Ohio State points out.
- Shredded leaves work well and are free. Shred them first; whole maple or oak leaves can mat into a wet layer. Our guide to composting fall leaves and making leaf mulch covers how.
- Pine needles are a good option where available.
- Skip fresh wood chips and grass clippings on garlic beds: chips are slow to pull back, and clippings mat and can heat up.
How thick and when to apply
Recommendations scale with your winter. University of Minnesota suggests 3 to 4 inches of straw or leaves after planting; South Dakota State says 3 to 6 inches of loose mulch; UMass goes up to 6 to 12 inches of straw, applied in mid to late November once the ground starts to freeze. A practical guide:
- Zones 3-4: 6 inches or more of loose straw, applied once the top inch of soil starts freezing.
- Zones 5-6: 4 to 6 inches, applied after planting or at the first hard freeze.
- Zone 7: 3 to 4 inches, mainly for weeds and moisture.
- Zones 8-10: 2 to 3 inches right after planting, to hold moisture and block weeds.
Straw settles a lot; 6 inches fluffy usually packs down to 2 or 3 inches by spring.
When to pull mulch back
In early spring, when green tips push through and hard freezes are mostly over, pull the mulch away from the shoots so the sun can warm the soil. UMass suggests leaving it between the rows to keep weeds down. South Dakota State notes that garlic shoots handle air temperatures down to about 20°F, while temperatures below 10°F can damage leaves, so keep some mulch handy if a hard cold snap is forecast.
In warm zones, you can leave a thin mulch all season.
Watch out: Garlic shoots poking through in fall or a January thaw are normal and rarely a problem. Do not dig up or cut back early shoots. Just keep them mulched; the bulb will still form in spring.
Gear that helps
- Straw mulch bale (weed-free): Clean straw is the recommended winter mulch for garlic.
As an Amazon Associate we earn from qualifying purchases. Check current prices and reviews on Amazon.
Fertilizing garlic
Garlic is a fairly heavy nitrogen feeder in spring. Most extension programs recommend splitting fertilizer into small doses rather than one big one:
- At planting: compost, or a light dose of balanced fertilizer worked into the bed.
- When spring shoots reach 4 to 6 inches: side-dress with a nitrogen source. Ohio State suggests 1 to 1.25 pounds of 19-19-19 per 100 square feet as the total for the season, split between doses. Organic options include blood meal or feather meal, which South Dakota State lists at about 2 cups per 100 feet of row.
- 2 to 3 weeks later: a second light side-dressing.
- Then stop. University of Minnesota advises no nitrogen after the first week of May in the North. Late nitrogen delays bulbing. In the South, wrap up feeding by early spring.
Whatever product you use, follow the label rates for vegetables.
The Year-Round Vegetable Garden (2027 Edition)
Plan the whole season in one place: a 225-page month-by-month guide with calendars for six US growing regions, 50 plant profiles (tomatoes included), 5 copy-ready garden plans and 7 printable pages.
Tomato lover? Add Tomato Mastery, our seed-to-harvest tomato blueprint, for just $10 at checkout.
Get the guide ($27)Planting garlic in raised beds and containers
Raised beds are a great fit for garlic: they drain fast, warm early in spring and let you plant on a tight 6-inch grid. The tradeoff is that raised beds freeze harder in cold zones, so mulch them generously in zones 3-5.
Containers work for a small harvest. Use a pot at least 8 to 10 inches deep with drainage holes, fill it with quality potting mix blended with some compost, and plant cloves 4 to 6 inches apart. A 5-gallon bucket or a 12-inch-wide pot holds about 5 or 6 cloves. Pots still need a winter chill, so leave them outdoors. In zones 3-6, soil in a pot freezes much colder than ground soil; sink the pot into the ground, group pots against a wall and pile mulch around them, or move them into an unheated garage after they have rooted.
Spring care for garlic
- Water: about 1 inch per week from spring green-up through bulbing. Garlic has shallow roots, so dry spells hit it hard.
- Weed: pull weeds by hand while small. Hoeing too close can nick shallow roots.
- Cut scapes: on hardneck garlic, snap off the scape after it curls. UMass notes the research on bulb-size gains is mixed, but scapes are an excellent early crop for pesto and stir-fries.
- Stop watering when the lower leaves start to yellow, about 1 to 2 weeks before harvest. Utah State points out that wet soil at maturity hurts storage.
Garden hack: Count the green leaves. Each green leaf above ground becomes a protective wrapper around the bulb. University of Illinois Extension suggests harvesting when about five green leaves remain, which keeps enough wrappers for good storage.
Gear that helps
- Soil thermometer: Helps time planting at about 50°F soil and track spring warming.
As an Amazon Associate we earn from qualifying purchases. Check current prices and reviews on Amazon.
A quick look at harvest
Fall-planted garlic is ready from late spring in the South to late June through July in the North. The University of Minnesota’s cue: harvest when the lower leaves have turned brown and about half of the upper leaves are still green. Loosen the soil with a garden fork and lift the bulbs instead of pulling the stems.
Cure bulbs in a shaded, dry, airy spot for 2 to 3 weeks before trimming and storing. Save your biggest, cleanest bulbs to plant next fall.
Common mistakes to avoid
- Planting grocery-store garlic that is not adapted to your climate or may carry disease.
- Planting too early, so leaves grow tall in a warm fall and get burned by winter cold.
- Planting too late in the North, so cloves have no time to root before the ground freezes.
- Separating cloves weeks ahead and letting them dry out.
- Peeling the cloves or damaging the basal plate.
- Choosing a wet site. Soggy winter soil rots cloves.
- Using hay instead of straw and planting a crop of weeds.
- Feeding nitrogen too late, which delays bulbing.
- Planting the small cloves and wondering why the bulbs are small.
FAQ
Which end of the garlic clove goes up?
The pointed end goes up and the flat, rooty base goes down. If you cannot tell, lay the clove on its side; it will still grow, just with a slightly curved neck.
Should I soak garlic cloves before planting?
Soaking is optional. Some growers soak cloves for a few hours in water to speed rooting, but extension guides do not require it. Plant soaked cloves the same day.
Can I plant garlic from the grocery store?
It may sprout, but extension services advise against it. Store garlic is often grown in mild climates, may not suit your winters, may have been treated to slow sprouting, and can introduce soil diseases. Buy seed garlic from a regional grower.
How many garlic cloves should I plant?
Each clove makes one bulb. Plant as many cloves as bulbs you want to harvest, plus a few extra to save for next year’s seed garlic. About 4 cloves fit per square foot at 6-inch spacing.
Can you plant garlic in the spring?
Yes, as early as the soil can be worked, but bulbs are usually smaller. Spring-planted cloves still need about a month of temperatures near 40°F, so chill them in the refrigerator first if needed.
Do I need to water garlic in winter?
Usually not. Water once at planting if the soil is dry, then let rain and snow do the work. In dry Western or Southern winters, water every few weeks when the soil is dry 2 inches down and not frozen.
Keep reading
Sources
- Growing garlic in home gardens – University of Minnesota Extension
- Growing Garlic in the Garden – Ohio State University Extension
- Garlic, Allium sativum – University of Wisconsin-Madison Extension
- Growing Garlic – UMass Extension Vegetable Program
- Garlic: How to Grow It – South Dakota State University Extension
- Planting and Growing Garlic – University of Illinois Extension
- Garlic – Oregon State University Horticulture
- Garlic in the Garden – Utah State University Extension
- Let’s Plant Some Garlic – NC State Extension
- 2023 USDA Plant Hardiness Zone Map – USDA Agricultural Research Service