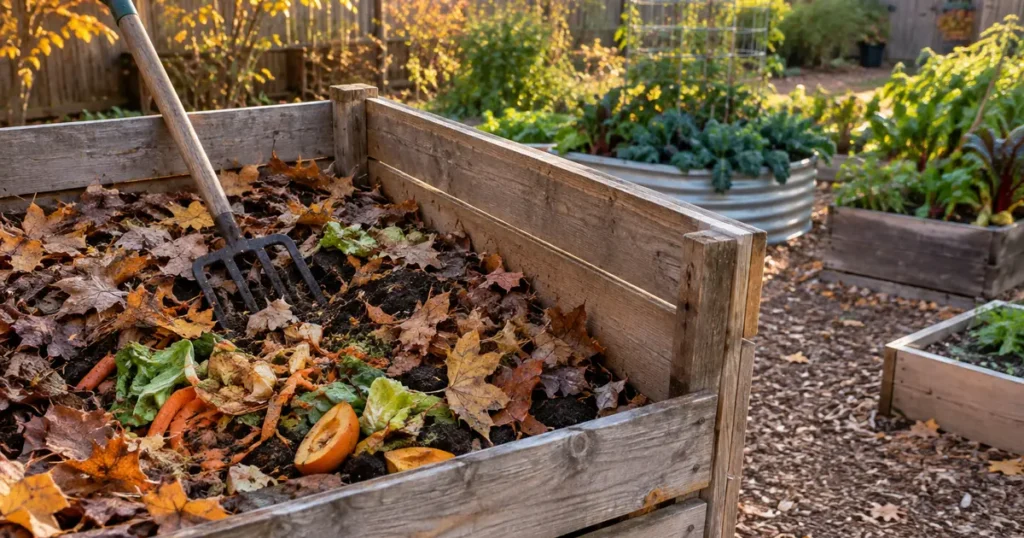
To make compost, pile up a mix of carbon-rich “browns” (dry leaves, straw, shredded cardboard) and nitrogen-rich “greens” (kitchen scraps, grass clippings), keep it about as damp as a wrung-out sponge, and give it air by turning it now and then. Microbes do the rest. A well-managed hot pile can give you finished compost in about 2-4 months; a hands-off cold pile gets there in 6 months to 2 years.
Quick answer
- Start with roughly 3 parts browns to 1 part greens by volume, then adjust.
- Build the pile at least 3 x 3 x 3 ft so it can heat up.
- Keep it moist like a wrung-out sponge and turn it every 1-2 weeks for faster results.
- A hot pile runs 131-160°F; that heat speeds decomposition and kills many weed seeds and pathogens.
- Compost is done when it is dark, crumbly, smells like soil and no longer heats up.
In this guide
- Composting for beginners: how compost works
- Brown and green compost materials
- What can you compost? (Yes/no table)
- How to start composting: choose your spot and setup
- How to make compost: step by step
- Hot vs. cold composting
- How long does it take to make compost?
- Compost pile troubleshooting
- Composting by USDA zone and season
- How to use finished compost in your vegetable garden
- Common mistakes to avoid
- FAQ
Want every planting date for your region in one place? Get The Year-Round Vegetable Garden (225 pages, $27).
Composting for beginners: how compost works
Compost is organic matter that bacteria, fungi, worms and other soil life have broken down into a dark, crumbly material that feeds your soil. You cannot really fail at composting; everything rots eventually. What you control is how fast it happens and whether it smells pleasant along the way.
The microbes need four things:
- Carbon for energy, from browns.
- Nitrogen to build their bodies, from greens.
- Water, about as much as a damp sponge holds (roughly 40-60% moisture).
- Oxygen, which you supply by mixing in bulky materials and turning the pile.
Get those roughly in balance and the pile heats up, shrinks and turns into compost. Get them out of balance and it either sits there doing nothing or turns into a smelly, soggy mess. The troubleshooting table below fixes both.
Brown and green compost materials
“Browns” and “greens” are shorthand for carbon-rich and nitrogen-rich materials. Color is only a rough guide: coffee grounds are brown but count as a green, and fresh-cut green leaves turn into browns once they dry.
- Browns (carbon): dry fall leaves, straw, shredded newspaper and plain cardboard, paper towels and napkins, sawdust from untreated wood, small twigs, dried plant stalks, pine needles.
- Greens (nitrogen): fruit and vegetable scraps, coffee grounds and paper filters, tea leaves, fresh grass clippings, green garden trimmings, weeds that have not gone to seed, manure from herbivores (chickens, rabbits, horses, cows).
Scientists talk about a carbon-to-nitrogen ratio of about 25-30:1 for fast composting. You do not need to calculate it. Because browns are lighter and fluffier than greens, about 3 buckets of browns for every 1 bucket of greens is a reliable place to start. Fall leaves are the classic brown; our guide to composting leaves shows how to shred and store them.
What if you only have kitchen scraps?
Most households produce far more greens than browns, especially in summer. Save cardboard boxes, paper egg cartons and plain paper bags, tear them up and use them as browns. Ask neighbors for bagged leaves in fall, or buy a bale of straw. If you have no yard at all, a worm bin indoors handles kitchen scraps without any browns beyond its paper bedding.
Garden hack: Keep a bag or bin of shredded leaves right next to your compost pile. Every time you dump a bucket of kitchen scraps, cover it with two or three scoops of leaves. That one habit keeps the ratio close, hides food from pests and stops odors.
What can you compost? (Yes/no table)
| Material | Compost it? | Notes |
|---|---|---|
| Fruit and vegetable scraps | Yes | Chop large pieces to speed things up. |
| Coffee grounds, paper filters, tea leaves | Yes | Remove plastic tea bags and staples. |
| Eggshells | Yes | Crush them; they break down slowly. |
| Fall leaves, straw, pine needles | Yes | Shred leaves for faster results. |
| Grass clippings | Yes | Only from lawns not treated with herbicides; mix in thin layers so they do not mat. |
| Plain cardboard, newspaper, paper towels | Yes | Shred or tear; skip glossy or coated paper. |
| Spent garden plants | Yes | Only healthy ones. |
| Herbivore manure (chicken, rabbit, horse) | Yes | Compost fully before using it on vegetables. |
| Bread, rice, pasta | Sparingly | Bury in the center; can attract rodents. |
| Wood ash | Sparingly | Small amounts only; it raises pH. Never charcoal or coal ash. |
| Black walnut leaves and hulls | Sparingly | Contain juglone, which harms tomatoes and peppers; compost thoroughly or skip. |
| Meat, fish, bones | No | Odors and pests. |
| Dairy, fats, oils, greasy food | No | Odors, pests, slows decomposition. |
| Dog and cat waste, used cat litter | No | Can carry parasites and pathogens. |
| Diseased or insect-infested plants | No | Home piles may not get hot enough everywhere to kill them. |
| Weeds with seeds, invasive perennial roots | No | They can survive and spread with the compost. |
| Treated or painted wood, sawdust from it | No | Chemical residues. |
| Plastic, glass, metal, “compostable” plastics | No | Most so-called compostable plastics need industrial facilities. |
How to start composting: choose your spot and setup
You can compost in a free-standing pile, a homemade wire or pallet bin, a store-bought bin or a tumbler. A bin keeps things tidy and helps with pests, but the method is the same in all of them. Our guide to the best compost bins compares the options.
- Location: Pick a level, well-drained spot that is easy to reach with a wheelbarrow and a hose and not too far from the kitchen. Partial shade keeps the pile from drying out in hot climates.
- Size: Aim for at least 3 x 3 x 3 ft (about 1 cubic yard). Smaller piles lose heat; piles larger than about 5 ft on a side can run short of air in the middle.
- Base: Set the pile on bare soil so worms and microbes can move in. If rodents are a concern, line the bottom of the bin with 1/4-inch hardware cloth.
- Check local rules: Some cities and HOAs require closed bins or set distances from property lines.
Gear that helps
- Kitchen compost pail with lid and filter: Collects scraps indoors between trips to the pile.
As an Amazon Associate we earn from qualifying purchases. Check current prices and reviews on Amazon.
How to make compost: step by step
This is the classic “batch” method for a compost pile. It works whether you plan to turn it often or not.
- Gather materials. Collect enough browns and greens to build most of a 3 x 3 x 3 ft pile at once, if you can. Fall is ideal, with leaves and spent garden plants everywhere.
- Chop it up. Shred leaves, break stalks and cut large scraps. Smaller pieces mean more surface for microbes and faster compost.
- Lay a coarse base. Start with 4-6 inches of twigs or stiff stalks for airflow.
- Layer browns and greens. Add about 6 inches of browns, then about 2 inches of greens, then a thin sprinkle of garden soil or finished compost to introduce microbes. Repeat.
- Water as you build. Moisten each layer. Dry leaves and straw shed water, so soak them well.
- Mix. Layers are a convenient way to measure, but the pile works best once everything is mixed. Turn it with a garden fork after a few days.
- Cover the top. A tarp, lid or thick layer of straw keeps rain from soaking it and sun from drying it.
- Monitor and turn. Check moisture weekly. Turn the pile every 1-2 weeks for hot composting, moving the outside material into the center.
If you add scraps a bucket at a time instead of all at once, that is fine too. It is called continuous composting, and it simply runs cooler and slower. Bury new scraps in the center and cover them with browns every time.
Gear that helps
- Compost aerator or garden fork: Makes turning and adding air to the pile much easier.
As an Amazon Associate we earn from qualifying purchases. Check current prices and reviews on Amazon.
Hot vs. cold composting
| Hot composting | Cold composting | |
|---|---|---|
| How it works | Big batch built at once, balanced and turned often | Materials added over time, rarely turned |
| Temperature | 131-160°F in the center | Close to air temperature |
| Time to finish | About 2-4 months | About 6 months to 2 years |
| Effort | Turning every 1-2 weeks, watching moisture | Very little |
| Weed seeds and pathogens | Many are killed if the whole pile gets hot | Mostly survive |
| Best for | Gardeners who want lots of compost fast | Busy gardeners, small households, kitchen scraps only |
Compost temperature: what the numbers mean
A compost thermometer with a long probe (about 20 inches) takes the guesswork out. In a balanced hot pile, temperatures climb within a few days. According to NC State Extension, temperatures of at least 131°F help kill human pathogens and at least 145°F help kill weed seeds. Above about 160°F, the heat starts killing the beneficial microbes too, so turn the pile to cool it down. As the pile cools below about 100°F, turn it again to restart the heating, until turning no longer makes it warm up.
Watch out: Only the center of a pile gets really hot. The outer layers stay cooler, so turning and moving outside material into the middle is what gives you even, weed-free compost. If your pile never gets hot, keep weeds with seeds and diseased plants out of it.
A sample hot-compost schedule
- Day 1: Build the full pile, mixed and moistened.
- Days 2-5: The center should feel hot and climb toward 131-160°F.
- Week 1-2: Turn when the temperature peaks or starts to drop, checking moisture as you go.
- Weeks 2-6: Keep turning about once a week. Each turn should bring a new burst of heat, smaller each time.
- Weeks 6-10: When turning no longer reheats the pile, stop and let it cure.
Your pile will shrink to about half its original volume or less along the way. That is normal and a good sign.
Gear that helps
- Long-stem compost thermometer (about 20 inches): Shows whether your pile reaches the 131-160°F hot-composting range.
As an Amazon Associate we earn from qualifying purchases. Check current prices and reviews on Amazon.
How long does it take to make compost?
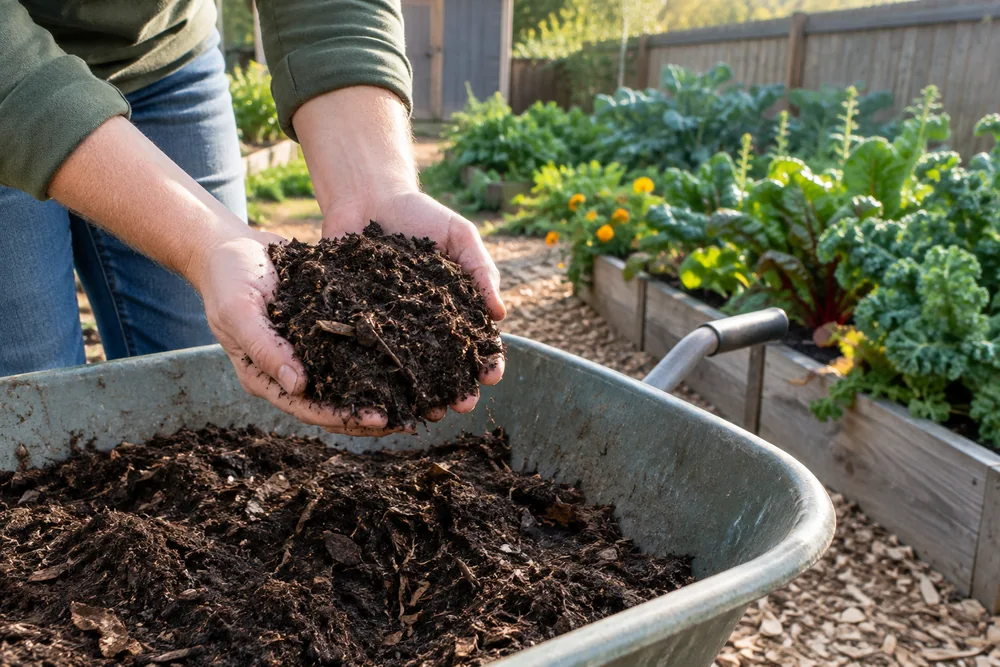
It depends on your materials, pile size, weather and effort:
- Hot, turned weekly, shredded materials: about 2-4 months in warm weather.
- Turned occasionally: about 4-8 months.
- Cold pile, never turned: 6 months to 2 years.
After the hot phase ends, let compost cure for 4-8 weeks or more before using it on young plants. NC State suggests 6-12 weeks of curing after heating stops. Curing lets the material finish stabilizing so it does not tie up nitrogen or harm tender seedlings.
How to tell when compost is ready
- Dark brown or black, with a crumbly texture
- Smells earthy, like a forest floor, with no ammonia or rotten odor
- You can no longer recognize most of the original materials
- The center stays within about 10°F of air temperature even after turning
A few sticks or eggshell bits are normal. Sift them out with a 1/2-inch screen and toss them back into the next pile.
Compost pile troubleshooting
| Problem | Likely cause | Fix |
|---|---|---|
| Smells like rotten eggs or garbage | Too wet, packed down, not enough air | Turn the pile and mix in dry browns such as shredded leaves or cardboard. |
| Smells like ammonia | Too many greens (too much nitrogen) | Add browns and mix. |
| Soggy and slimy | Too much water or too many wet greens like grass | Add browns, turn, cover the pile from rain. |
| Not heating up | Too dry, too small, or not enough greens | Add water until damp, add greens, build it to at least 3 x 3 x 3 ft. |
| Hot in the center only | Normal for an unturned pile | Turn, moving the outside into the middle. |
| Dry, nothing happening | Not enough water | Water while turning until it feels like a wrung-out sponge. |
| Rats, raccoons, flies | Exposed food scraps or forbidden foods | Bury scraps under browns, skip meat and dairy, use a closed bin lined with 1/4-inch hardware cloth. |
| Grass clippings matted into a slab | Thick layer of clippings | Break up, mix with browns, add clippings in thin layers. |
Gear that helps
- 1/4-inch galvanized hardware cloth: Lines a bin to keep rats and other rodents out.
As an Amazon Associate we earn from qualifying purchases. Check current prices and reviews on Amazon.
Composting by USDA zone and season
Composting slows to a crawl when piles freeze and races in summer heat. Use this as a general guide, and check your local frost dates and extension office, because microclimates vary.
| USDA zone | Best time to build a hot pile | Winter behavior | Main tip |
|---|---|---|---|
| 3-4 | Late spring to early fall | Piles freeze solid for months | Build a big batch in early fall; stockpile leaves and keep adding scraps in winter. |
| 5-6 | Spring through fall | Outer layers freeze; large, insulated piles keep working slowly | Insulate with leaves or straw bales; turn again in spring. |
| 7 | Most of the year | Slows but rarely stops | Cover piles from heavy winter rain. |
| 8-10 | Fall through spring | Active year-round | Summer heat dries piles quickly; water more and use partial shade. |
Winter composting in cold zones
In zones 3-6 you do not have to stop composting in winter; you just change expectations.
- Go big. Larger piles hold heat in the center longer.
- Insulate. Surround the bin with straw bales or bags of leaves, or line it with 6-12 inches of leaves or wood chips.
- Keep layering. Keep adding kitchen scraps, always topped with browns. Frozen scraps break down fast once spring arrives, because freezing ruptures their cells.
- Do not turn a frozen pile. Turning in deep cold releases what little heat is left. Wait until it thaws in spring, then turn and add more browns if it is soggy.
- Stage scraps. If the bin is buried in snow, keep a lidded bucket or trash can of scraps near the door and empty it on milder days.
The Year-Round Vegetable Garden (2027 Edition)
Plan the whole season in one place: a 225-page month-by-month guide with calendars for six US growing regions, 50 plant profiles (tomatoes included), 5 copy-ready garden plans and 7 printable pages.
Tomato lover? Add Tomato Mastery, our seed-to-harvest tomato blueprint, for just $10 at checkout.
Get the guide ($27)How to use finished compost in your vegetable garden
- New or tired beds: Mix 1-2 inches of compost into the top 6-8 inches of soil.
- Established beds: Top-dress with about 1 inch each spring or fall. On no-dig beds, just spread it on the surface.
- Planting holes: Add a shovelful to tomato, squash and pepper holes at transplant time.
- Mulch: A 1-2 inch layer around plants feeds soil life and holds moisture.
- Potting mix: Screened compost can make up about a quarter to a third of a homemade container mix.
- Fall bed prep: Spread compost on emptied beds, then add a cover crop or leaf mulch on top. See our guide to cover crops for vegetable gardens.
Garden hack: Not sure your compost is fully cured? Sow a few radish or lettuce seeds in a small pot of it. If they sprout and grow normally within a week or two, it is ready for seedlings.
Common mistakes to avoid
- Too many greens. A pile of kitchen scraps and grass alone goes slimy and smells. Add browns every time.
- Letting it dry out. A dry pile simply stops. Check moisture weekly in summer.
- Building too small. Under about 3 x 3 x 3 ft, piles rarely heat up.
- Adding meat, dairy or pet waste. These invite pests and health risks.
- Composting weeds that have gone to seed. Unless the pile stays above 145°F throughout, you will spread them.
- Using unfinished compost on seedlings. Let it cure first.
- Ignoring local rules. Some cities and HOAs require enclosed bins.
FAQ
What is the fastest way to make compost?
Build a 3 x 3 x 3 ft pile all at once from shredded browns and greens at about 3:1 by volume, keep it as damp as a wrung-out sponge, and turn it every week. In warm weather this hot method can produce compost in about 2-4 months.
What is the right ratio of browns to greens in compost?
Start with about 3 parts browns to 1 part greens by volume. If the pile stays cold, add greens. If it smells or turns slimy, add browns. This roughly matches the 25-30:1 carbon-to-nitrogen ratio microbes like best.
Should a compost pile be in the sun or shade?
Either works. Partial shade is ideal in hot, dry climates because it keeps the pile from drying out, while a sunny spot helps in cool northern zones. Easy access to water matters more than sun.
Do I need to turn my compost pile?
No, but turning adds air and speeds things up a lot. Turn every 1-2 weeks for hot composting. An unturned pile still becomes compost, it just takes 6 months to 2 years.
Can I compost in winter?
Yes. Keep adding scraps topped with browns. In cold zones the pile may freeze and pause, but large or insulated piles keep working in the center, and everything restarts when it thaws in spring.
Why does my compost smell bad?
A rotten smell usually means the pile is too wet and lacks air; turn it and mix in dry browns. An ammonia smell means too many greens; add browns. Finished compost should smell earthy.
Keep reading
Sources
- Home Composting: A Guide for Home Gardeners – Penn State Extension
- Backyard Composting of Yard, Garden, and Food Discards – NC State Extension
- Backyard Composting: It’s Only Natural – U.S. Environmental Protection Agency
- Can You Compost in the Winter? – University of New Hampshire Extension
- Walnut Leaves: Safe for Composting? – Oregon State University Extension