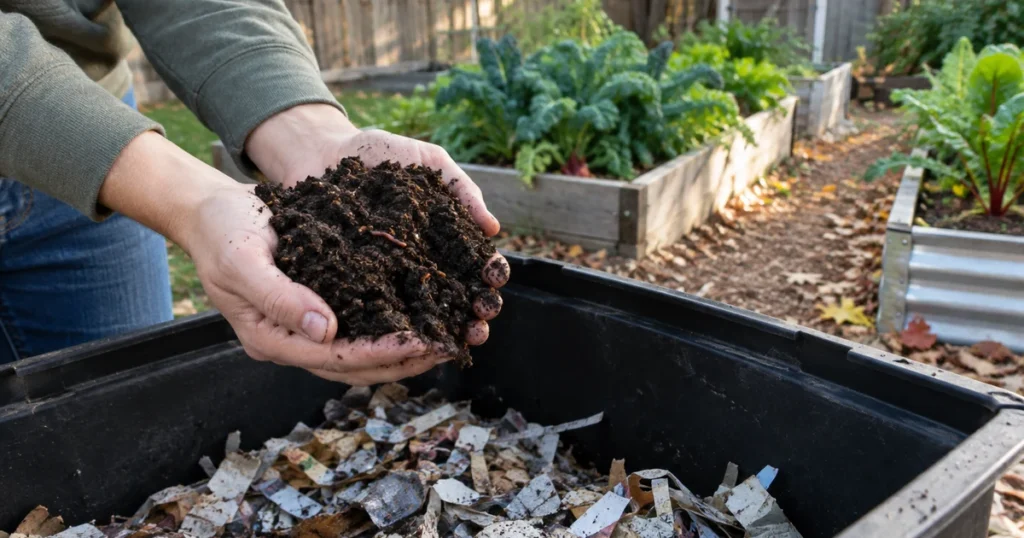
Worm castings are the dark, crumbly material left behind after composting worms digest food scraps and bedding. Also called vermicompost, they are a gentle, slow-release soil amendment that improves structure and feeds soil life, not a miracle fertilizer. You can buy them by the bag or make your own with a simple worm bin and a pound of red wigglers.
Quick answer
- Worm castings are low in nutrients (roughly 1-2% nitrogen) but rich in organic matter and microbes.
- Use them as a top-dressing (1/4 to 1/2 inch around plants) or as 10-20% of a potting mix.
- A home worm bin needs red wigglers, damp shredded bedding and 60-77°F temperatures.
- Plan on 1 square foot of bin surface per pound of weekly food scraps.
- Expect your first harvest of castings after about 3-4 months.
In this guide
Want every planting date for your region in one place? Get The Year-Round Vegetable Garden (225 pages, $27).
What are worm castings?
Technically, castings are worm manure. In practice, the “worm castings” you buy or harvest is vermicompost: a mix of castings, partly broken-down bedding and food, plus a huge population of microbes. It looks like fine, dark coffee grounds and smells earthy.
Composting worms are not the earthworms in your garden. The species used in bins, mainly the red wiggler (Eisenia fetida), lives near the surface in rotting leaves and manure, eats fast and thrives in a crowded bin. Nightcrawlers and garden earthworms burrow deep and do poorly in a box.
Worm castings benefits: what they can and cannot do
Worm castings are excellent compost. Research and extension sources point to real but modest benefits:
- Better soil structure: like any compost, they add organic matter that helps sand hold water and clay drain.
- Gentle nutrients: nutrients are released slowly, so castings will not burn seedlings when used at normal rates.
- Active soil life: they carry a large, diverse microbial population.
- Better growth in container mixes: university greenhouse trials found that replacing about 10-20% of a commercial potting mix with vermicompost improved seedling growth of tomatoes and marigolds.
- Possible disease suppression: some studies show suppression of certain soilborne diseases, but results vary and are not a substitute for good garden practices.
What they will not do: replace fertilizer for heavy feeders, fix a pH problem or double your harvest. Published analyses of vermicompost typically land around 1-2% nitrogen and similar small amounts of phosphorus and potassium, depending on what the worms ate. That is in the same range as good bin compost. Large amounts can also be counterproductive: in the same greenhouse studies, growing in 100% vermicompost reduced growth, likely from high salts and poor drainage.
Watch out: Be wary of bags claiming specific high N-P-K numbers or “miracle” results from castings alone. Real vermicompost is a soil conditioner. If a label shows high nutrient numbers, fertilizer has likely been added; read the ingredient list.
How to use worm castings in the garden
| Use | How much | Tip |
|---|---|---|
| Top-dressing vegetables | 1/4 to 1/2 inch around plants, or about a handful per plant | Scratch lightly into the surface and water in; mulch over it |
| Transplant holes | 1-2 handfuls mixed into the hole | Great for tomatoes, peppers and squash at planting time |
| Potting mix for containers | 10-20% of the mix by volume | About 1 part castings to 4-9 parts potting mix |
| Seed-starting mix | No more than 10-20% | Keeps the mix light; too much stays soggy and can raise salts |
| Garden beds | Use like compost, spread 1/2 inch or more | Cheaper in-ground options: homemade compost or leaf mold |
| Houseplants and herbs | 1/4 inch on the surface every 2-3 months | Works well for an indoor herb garden |
Because castings are concentrated and often pricey, they make the most sense where a little goes a long way: containers, seedlings, transplant holes and raised beds. For whole gardens, combine them with regular compost. If you start your own seedlings, mixing a little into a seed-starting mix is a popular choice.
What about worm casting tea?
Steeping castings in water makes a mild liquid feed. A simple version: about 2 tablespoons of castings per quart of water, steeped for a day and used within 24 hours. Keep expectations modest; results on disease control are inconsistent. More important, University of Connecticut extension specialists caution that brewed teas, especially those with added molasses or other sugars, can grow human pathogens such as E. coli and Salmonella. Apply teas to the soil, not to leaves or fruit you will eat, and stop well before harvest.
Garden hack: Instead of brewing tea, simply water your seedlings through a thin top layer of castings. You get the same gentle nutrients and microbes with none of the brewing or food-safety risk.
Vermicomposting: how to set up a worm bin, step by step
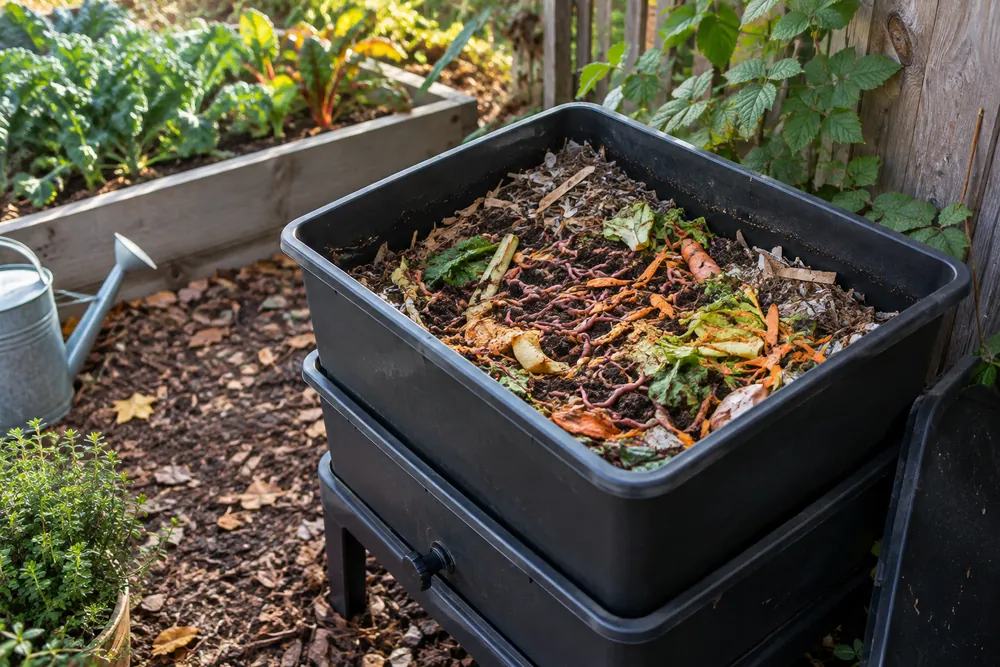
A worm bin turns kitchen scraps into castings quietly, without odor when run correctly, and fits under a sink, in a basement or in a garage.
- Choose a bin. A shallow, opaque plastic tote of 10-18 gallons works well; worms feed near the surface, so 8-12 inches deep is enough. Size it at about 1 square foot of surface area per pound of food scraps you produce each week. A household of two to four people often fits in a 2 x 2 ft or 2 x 3 ft bin.
- Drill holes. Make several 1/4-inch holes in the bottom for drainage and a row of 1/8- to 1/4-inch holes near the top of the sides for air. Set the bin on blocks over a tray to catch any liquid.
- Make the bedding. Fill the bin about half full with strips of newspaper (under 1 inch wide), shredded corrugated cardboard, dry leaves or coconut coir. Skip glossy paper and cross-cut confetti, which packs down.
- Moisten it. Soak or spray the bedding until it feels like a wrung-out sponge: squeezing a handful should release only a couple of drops.
- Add grit. Mix in a handful of garden soil or finished compost. It adds microbes and fine grit that helps worms process food.
- Add worms. Start with about 1 pound of red wigglers (roughly 1,000 worms) per square foot of bin surface. Order them from a worm supplier or get some from a friend’s bin; bait-shop nightcrawlers will not work.
- Start feeding slowly. Bury a small amount of chopped scraps under the bedding in one corner. Wait until most of it is gone before feeding again, rotating corners.
- Keep it covered. Lay a sheet of damp newspaper or cardboard over the bedding and put the lid on. Worms like dark, moist conditions.
What to feed worms (and what not to)
Yes: fruit and vegetable scraps, coffee grounds and paper filters, tea bags without staples, crushed eggshells, plain bread or pasta in small amounts, shredded paper and cardboard.
No: meat, fish, dairy, oils and greasy food, salty food, pet waste, and large amounts of citrus, onions or garlic. Go easy on cabbage-family scraps, which can smell as they rot.
An established pound of worms eats roughly 1/2 pound to 1 pound of scraps a week at first, rising as the population grows.
Ideal worm bin temperature by zone
Red wigglers do best at about 59-77°F. They slow down below 50°F, and temperatures under 40°F or over 95°F can kill them. That decides where your bin lives through the year. Check your local frost dates and extension office, because microclimates vary.
| Zone | Outdoor bin season | Winter | Summer |
|---|---|---|---|
| 3-4 | Late May to September | Move indoors: basement, laundry room or a heated garage | Shade is usually enough |
| 5 | May to early October | Indoors or a garage that stays above 40°F | Partial shade |
| 6-7 | April to October | Garage or basement; a bin insulated with straw bales can survive mild spells | Full shade during heat waves |
| 8 | Most of the year | Outdoors in a sheltered spot; cover or move during hard freezes | Full shade; move inside when highs top the mid-90s |
| 9-10 | October to May | Outdoors is fine | Heat is the main danger: keep the bin indoors or in deep shade |
The Year-Round Vegetable Garden (2027 Edition)
Plan the whole season in one place: a 225-page month-by-month guide with calendars for six US growing regions, 50 plant profiles (tomatoes included), 5 copy-ready garden plans and 7 printable pages.
Tomato lover? Add Tomato Mastery, our seed-to-harvest tomato blueprint, for just $10 at checkout.
Get the guide ($27)How to harvest worm castings
After about 3-4 months, most of the bedding will have turned into dark castings. Use one of these methods:
- Side-to-side: push the finished material to one side and add fresh bedding and food to the other. Over 2-4 weeks the worms migrate to the food; scoop out the finished side.
- Light method: dump the bin onto a tarp in bright light and make small cone-shaped piles. Worms burrow down away from light. Scrape castings off the top every 10-15 minutes until mostly worms remain, then return them to fresh bedding.
- Stacking trays: in a stacking system, feed only the top tray. Worms move up, leaving finished castings in the lower trays.
Let harvested castings air out for a few days and pick out any worms or cocoons before using them in pots. Store them in a bag or bucket with a few holes, slightly moist, and use within several months.
Worm bin troubleshooting
| Problem | Likely cause | Fix |
|---|---|---|
| Rotten smell | Overfeeding, too wet, not enough air | Stop feeding for 1-2 weeks, add dry bedding, fluff the bin, check drainage holes |
| Fruit flies or fungus gnats | Exposed food, overripe scraps | Always bury food under bedding, keep a damp newspaper cover, freeze scraps before adding |
| Worms crawling out | Too wet, too hot, too acidic or a new bin | Add dry bedding, cool the bin, add crushed eggshells; leave a light on for the first nights |
| Worms dying or few worms | Too dry, too hot or cold, toxic food | Mist bedding, keep at 59-77°F, remove salty, oily or spicy food |
| Liquid pooling in the bottom | Watery scraps, too few holes | Add dry shredded cardboard, drill more holes, drain the tray |
| Food not breaking down | Too many scraps, pieces too big, bin too cold | Feed less, chop scraps, move the bin somewhere warmer |
Garden hack: Freeze kitchen scraps in a container before adding them to the bin. Freezing bursts the cells so worms eat them faster, and it kills fruit fly eggs that ride in on peels.
Gear that helps
- Stacking worm composting bin: Makes harvesting castings easy because worms migrate up into the next tray.
- Coconut coir bedding brick: Clean, moisture-holding bedding for starting a new worm bin.
As an Amazon Associate we earn from qualifying purchases. Check current prices and reviews on Amazon.
Buying worm castings: what to look for
- Ingredients: look for 100% worm castings or vermicompost, without added fillers.
- Texture and smell: dark, fine and crumbly, with an earthy smell. Sour or ammonia smells mean it is not finished.
- Moisture: slightly damp is normal and keeps microbes alive; bone-dry dust or soggy clumps are not ideal.
- Organic certification: if you garden organically, look for OMRI listing.
For large garden beds, homemade compost is far cheaper; see how to make compost and our garden soil guide.
Gear that helps
- OMRI-listed worm castings: Ready-made vermicompost for containers and transplants if you do not keep a bin.
As an Amazon Associate we earn from qualifying purchases. Check current prices and reviews on Amazon.
Common mistakes to avoid
- Using garden earthworms or nightcrawlers in a bin. Use red wigglers.
- Overfeeding a new bin. Start small and wait until food disappears.
- Letting the bin dry out or get soggy. Aim for a wrung-out sponge.
- Leaving a bin in direct summer sun or freezing weather.
- Expecting castings to replace fertilizer. They are a gentle amendment.
- Growing in pure castings. Keep them to 10-20% of a potting mix.
- Spraying homemade tea on edible leaves near harvest. Apply it to the soil.
FAQ
Are worm castings better than compost?
They are similar. Worm castings are finer and carry a large microbial population, and trials show benefits at 10-20% of potting mixes, but their nutrient levels are close to good bin compost. For large beds, regular compost is more economical.
Can you use too much worm castings?
Yes. Growing plants in pure castings can reduce growth because of salts and poor drainage. Use them as a top-dressing or as about 10-20% of a potting mix.
How long does it take to get worm castings?
A new bin typically produces its first harvestable castings in about 3-4 months, depending on temperature, feeding and the number of worms.
Do worm castings burn plants?
No, not at normal rates. Their nutrients are low and release slowly, so they are safe around seedlings and young transplants.
What worms are best for a worm bin?
Red wigglers (Eisenia fetida) are the standard. They live near the surface, tolerate crowding and eat quickly. Garden earthworms and nightcrawlers do not adapt well to bins.
Does a worm bin smell?
A healthy bin smells earthy. Bad odors almost always come from overfeeding, too much moisture or the wrong foods, and clear up within a week or two after you correct them.
Keep reading
Sources
- Vermicomposting Puts Worms to Work – Penn State Extension
- Worms Can Recycle Your Garbage – NC State Extension
- Vermicomposting: Worms at Work – Alabama Cooperative Extension System
- Composting With Worms – University of Alaska Fairbanks Cooperative Extension Service
- Compost, Compost Tea, and Manure: Food Safety Implications in the Vegetable Garden – University of Connecticut
- Effects of Vermicomposts and Composts on Plant Growth in Horticultural Container Media and Soil – Pedobiologia (Ohio State University researchers)