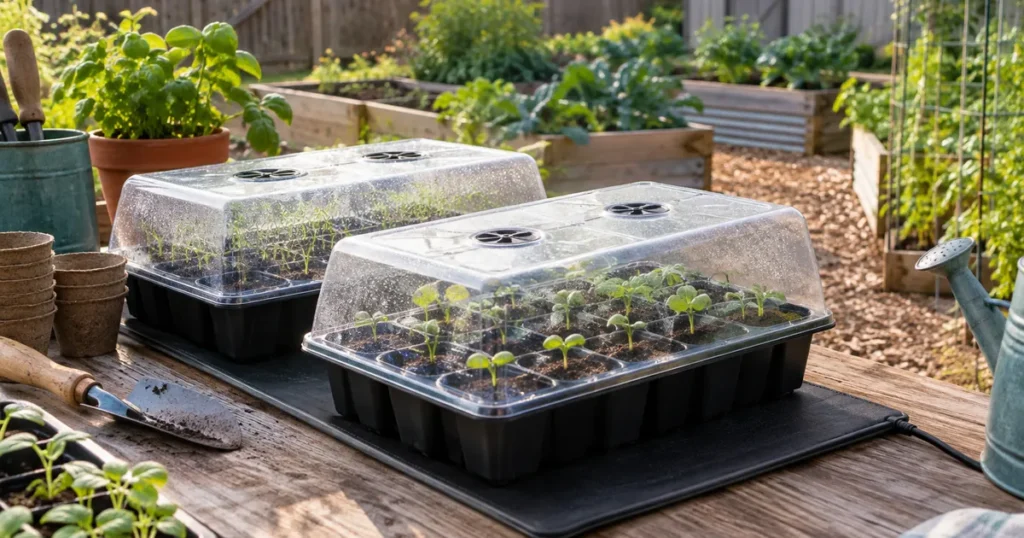
The best seed starting trays for most home gardeners are 50- or 72-cell inserts set in a solid 10 x 20 inch tray with a clear humidity dome. Cells give each seedling its own root ball, the solid tray lets you water from below, and the dome holds moisture until seeds sprout. Add a heat mat with a thermostat for peppers, eggplant and tomatoes, and you have a complete seed starting kit.
Quick answer
- Cell trays are the easiest all-round choice; open flats, soil blocks and peat or fiber pots each have a niche.
- Match cell size to the crop: small cells for lettuce and onions, medium for tomatoes, peppers and broccoli, large cells or pots for squash and cucumbers.
- Use a solid bottom tray for bottom watering, and take the humidity dome off once most seeds sprout.
- A heat mat set around 70-80°F speeds germination of warm-season crops; a thermostat keeps it from overheating.
- Reuse sturdy trays: wash, then soak in 1 part bleach to 9 parts water and let them dry.
In this guide
Want every planting date for your region in one place? Get The Year-Round Vegetable Garden (225 pages, $27).
Types of seed starting trays
Cell trays (plug trays and cell packs)
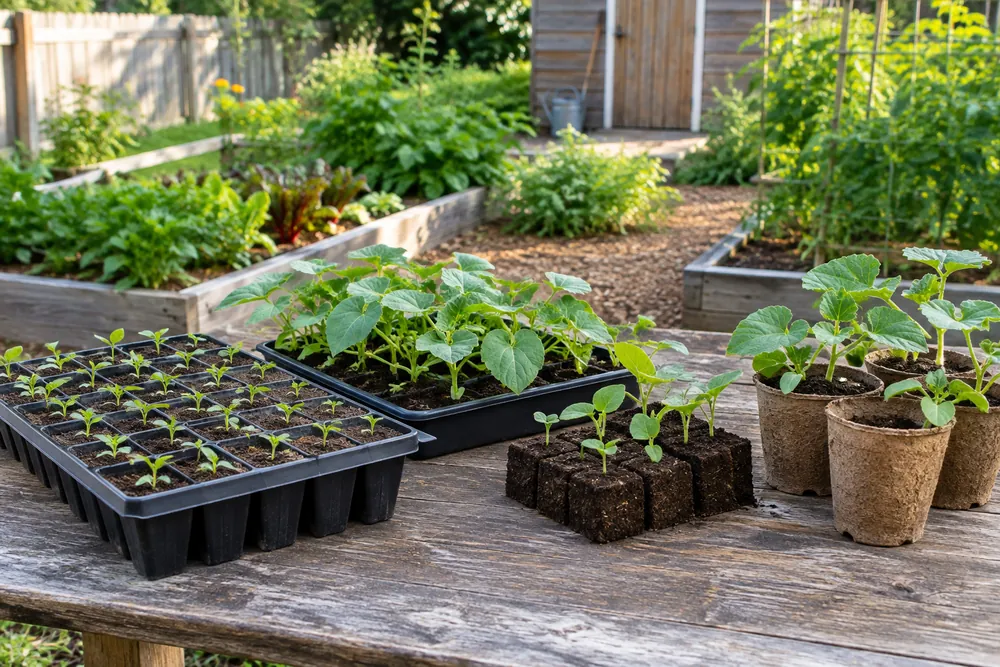
Cell trays are plastic inserts divided into individual cells, from 4-6 cell “pony packs” up to commercial plug trays with 288 cells. Utah State University Extension notes that 36, 48 and 72 cells per flat are the common hobby sizes. Each seedling grows in its own pocket of mix, so roots stay intact when you transplant or pot up.
Thin, flimsy inserts often crack after a season or two. Thicker, rigid trays cost more but can last many years with care.
Open flats
An open flat is a tray with no dividers, filled with mix and sown in rows. It holds a lot of seedlings in little space, which suits crops you will prick out and transplant into cells or pots once they have their first true leaves, such as onions, leeks, lettuce and many flowers. The downside is root tangling: you have to tease seedlings apart, which sets them back if you wait too long.
Soil blocks
A soil blocker is a hand tool that presses wet mix into free-standing cubes, each with a small dimple for the seed. There is no container at all. Because roots stop growing when they reach the air at the block’s edge, they do not circle the way they do in plastic cells, which can reduce transplant shock.
Blocks need a dense, fibrous blocking mix that holds its shape when wet, and they dry out faster than cells, so they suit gardeners who check their seedlings daily. The tool is a one-time purchase that replaces plastic trays for years.
Peat pots, fiber pots and pellets
Peat pots and molded fiber pots are planted right into the garden along with the seedling, so roots are never disturbed. University of Minnesota Extension recommends them for crops that resent transplanting, like cucumbers and squash. Compressed peat or coir pellets swell in water into small plugs wrapped in netting.
They have quirks. Peat pots dry out quickly and can wick moisture away from roots if the rim sticks out above the soil, so tear off the rim at planting. Remove pellet netting, or at least slit it, so it does not restrict roots.
Gear that helps
- Heavy-duty reusable cell trays: Rigid trays last many seasons instead of cracking after one
- Soil blocker: Plastic-free alternative with air-pruned roots
As an Amazon Associate we earn from qualifying purchases. Check current prices and reviews on Amazon.
Comparing seed starting containers
| Type | Best for | Pros | Cons |
|---|---|---|---|
| Cell trays | Almost all transplanted crops | Easy to water, individual root balls, reusable | Roots can circle if left too long; cheap ones crack |
| Open flats | Onions, leeks, lettuce, crops you will prick out | Many seedlings in a small space | Roots tangle; extra transplanting step |
| Soil blocks | Gardeners who want no plastic and less transplant shock | Air-pruned roots, no containers to store | Need special mix and a tool; dry out fast |
| Peat or fiber pots | Cucumbers, squash, melons | Plant pot and all, no root disturbance | Dry out quickly; single use |
| Peat or coir pellets | Small batches of seeds | Convenient, no mixing | Small, dry fast; netting can restrict roots |
What cell size do you need for each crop?
The New England Vegetable Management Guide groups cell sizes by crop: small cells for lettuce and onions, mid-size for tomatoes, peppers, eggplant and the cabbage family, and large cells for cucurbits. Smaller cells dry out faster and hold seedlings for less time before they need potting up, so home gardeners often go one size larger than commercial growers.
| Crop | Suggested cell or container | Notes |
|---|---|---|
| Lettuce, onions, leeks | 72- to 128-cell trays, or open flats | Onions and leeks can be sown several to a cell |
| Broccoli, cabbage, cauliflower, kale | 50- or 72-cell trays | Usually go to the garden straight from the cell |
| Tomatoes, peppers, eggplant | 50- or 72-cell trays, then 3-4 inch pots | Pot up when roots fill the cell |
| Celery, parsley, basil | 72-cell trays | Slow starters; keep evenly moist |
| Cucumbers, squash, melons | 32- or 50-cell trays, or 3-4 inch fiber pots | Sow directly in the final container, 3-4 weeks before planting out |
Containers should be at least 2 inches deep with drainage holes, according to several extension services. A standard flat is about 10.5 x 21 inches, so most inserts, domes and heat mats are sized to fit it.
Garden hack: Label each row of a cell tray, not each cell. Push one plant tag at the start of every row with the variety and sow date, and keep a quick sketch of the tray on your phone. You can tell eight tomato varieties apart even after a tag goes missing.
Humidity domes
A clear plastic dome sits on the tray and traps moisture so the mix surface stays damp while seeds germinate. Taller domes leave headroom for seedlings; many have small adjustable vents.
The dome’s job ends at germination. University of Maine Extension advises taking off the covering once about half the seeds have sprouted. Left on longer, a dome keeps leaves wet and air stagnant, the conditions that favor damping-off.
Gear that helps
- Tall vented humidity dome: Keeps germinating seeds moist with room for seedlings
As an Amazon Associate we earn from qualifying purchases. Check current prices and reviews on Amazon.
Bottom-watering trays
The solid tray under your cell insert is not optional. With no drainage holes, it holds water so you can water from below: pour in 1-2 inches of water, let the mix soak it up for about 10-20 minutes, and pour off the rest. Bottom watering keeps seeds in place, keeps the surface drier, and reaches every cell evenly.
Some kits include a capillary mat, a felt pad that wicks water from a reservoir into the cells. It saves time but can keep the mix too wet, so check that cells are not staying soggy.
Heat mats for seeds: which crops benefit?
A seedling heat mat is a waterproof pad that warms the tray from below. Germination speed depends on the temperature of the mix, and in a cool basement the mix can sit well below the room air temperature.
- Benefit most: peppers, eggplant, tomatoes, tomatillos, okra, basil, cucumbers, squash and melons. Their seeds germinate best with the mix around 75-85°F and are slow or unreliable in a cool room.
- Do fine without: broccoli, cabbage, kale, onions and leeks germinate well at normal room temperature.
- Keep off the mat: lettuce germinates poorly when the mix runs too warm, so start it on a cool shelf.
A mat on its own simply adds heat, so its effect depends on the room. A plug-in thermostat with a probe pushed into the mix turns the mat on and off to hold a set temperature. University of Maine and Utah State extensions both work from about 70°F; set it closer to 80°F for peppers and eggplant. Move trays off the mat once most seeds are up: growing seedlings prefer cooler conditions, around 65-70°F.
Watch out: Never put a heat mat directly under a tray without a solid bottom, and never let it sit in standing water unless the maker says it is rated for that. Unplug it before handling wet trays, and use a GFCI outlet in damp areas.
The Year-Round Vegetable Garden (2027 Edition)
Plan the whole season in one place: a 225-page month-by-month guide with calendars for six US growing regions, 50 plant profiles (tomatoes included), 5 copy-ready garden plans and 7 printable pages.
Tomato lover? Add Tomato Mastery, our seed-to-harvest tomato blueprint, for just $10 at checkout.
Get the guide ($27)Gear that helps
- Seedling heat mat and thermostat set: Holds the mix at the right temperature for peppers and tomatoes
As an Amazon Associate we earn from qualifying purchases. Check current prices and reviews on Amazon.
What is in a seed starting kit?
A basic seed starting kit includes a solid bottom tray, a cell insert and a clear dome. Larger kits add a heat mat, a thermostat, plant labels or even a small grow light. Before you buy, check that:
- The tray has no holes, so it can hold water for bottom watering.
- The cell insert has drainage holes and a cell size that suits your crops.
- The dome is tall enough to clear seedlings for a few days.
- The plastic is thick enough to reuse for several seasons.
- Any heat mat fits the tray and can be paired with a thermostat.
You will still need seed starting mix and, for most crops, a light source. See our guides on seed starting mix and grow lights for seedlings.
How to reuse and sanitize seed starting trays
Plastic trays and inserts can be reused for years if you clean them between seasons, which removes disease organisms that can cause damping-off.
- Knock out old mix and roots, and rinse off loose soil.
- Wash in warm, soapy water with a brush, paying attention to cell corners.
- Disinfect. Soak or dip trays in a solution of 1 part household chlorine bleach to 9 parts water, as University of Missouri and Oregon State extensions recommend. Utah State Extension also lists quaternary ammonium disinfectants as an option; follow the label.
- Rinse and air-dry completely before storing or filling.
- Store stacked out of sunlight, which makes plastic brittle.
Discard trays that are cracked or warped. Peat pots, fiber pots and pellets are single-use.
Common mistakes to avoid
- Using trays without drainage as the growing container. Only the outer tray should be solid.
- Choosing cells that are too small for tomatoes or squash and then waiting too long to pot up.
- Leaving the dome on after germination.
- Running a heat mat with no thermostat in a warm room, which can cook seeds or dry out cells.
- Skipping the bleach dip when reusing trays.
For the full process, from filling cells to planting out, see our guide on how to start seeds indoors.
FAQ
What size seed starting tray should I use?
A 72-cell tray suits most vegetables, while 50-cell trays give tomatoes and peppers more room. Use 128-cell trays or open flats for lettuce and onions, and larger cells or pots for squash and cucumbers.
Do I need a heat mat to start seeds?
Not for every crop, but it makes a big difference for peppers, eggplant and tomatoes in a cool house. Cabbage-family crops and onions germinate fine at room temperature.
What temperature should a seedling heat mat be?
Set the thermostat around 70-80°F, with peppers and eggplant at the upper end. Move trays off the mat once most seeds have sprouted.
When should I remove the humidity dome?
Remove it once about half of the seeds have sprouted. Leaving it on longer encourages damping-off.
Are soil blocks better than cell trays?
Soil blocks air-prune roots and use no plastic, but they need a special mix and dry out faster. Cell trays are easier for most beginners.
Can I reuse plastic seed trays?
Yes. Wash them, soak them in a 1:9 bleach-to-water solution, rinse and let them dry before reusing.
Keep reading
Sources
- Starting Vegetable Seeds Indoors: II. Materials – Utah State University Extension
- Seeding and Transplanting, New England Vegetable Management Guide – UMass Amherst and New England land-grant universities
- Starting seeds indoors – University of Minnesota Extension
- Containers and Potting Soil for Indoor Seed Starting – University of Maryland Extension
- When should you remove the bottom heat when starting seeds indoors? – University of Maine Cooperative Extension
- Starting Plants Indoors From Seeds – University of Missouri Extension
- Starting Seeds Indoors – Clemson Cooperative Extension, Home & Garden Information Center